Showing posts with label side dishes. Show all posts

Saturday, April 29, 2017

Grilled Potato Packets


The weather in NJ has finally gotten to the point where I can say, "Ohhhh it's grilling season!" Growing up it was always grilling season... my dad would be out grilling steak in the snow. I have to say I am definitely not that committed to the craft. Since I really only use my grill during the spring and summer I really look forward to it!

I had bought a few potatoes with intentions of making baked potatoes but at the last minute decided to throw them on the grill along with the steak I was making. These were to die for. I haven't had the best of luck with Pioneer Woman recipes but these were amazing. I mean... butter and cream really can't be bad. The sauce on these was incredible. I have a feeling these will be made again (and again) this spring and summer!

...you see that creamy sauce coating these? Mmmmm!

Source: Adapted from Pioneer Woman

Ingredients:
2 Russet potatoes, diced
3 tbsp butter
2 tbsp light cream
Salt
Garlic powder
Dried parsley
Crushed black pepper

Directions:
1- Lay out two foil sheets.
2- Evenly place the foil in the center of each sheet of foil.
3- Top each pile of potatoes with 1.5 tbsp butter and 1 tbsp of cream.
4- Season well with salt, garlic powder, parsley, and black pepper.
5- Roll up the foil to form a packet.
6- Cook on the hottest part of the grill for about 30 minutes.
7- Carefully open the foil. Stir well to get the sauce from the bottom to coat all of the potatoes.

Monday, September 8, 2014

Cheesy Zucchini Rice


I was a very (very) lazy cook this summer but one of my favorite new discoveries was this cheesy zucchini rice. For starters, it's so simple- you can't mess it up. Then there's the benefit that there's a veggie hidden in my cheesy delicious rice, so it MUST be healthy, right? I love side dishes more than main meals in almost all instances and this is a side dish worth celebrating!

Source: A Taste of Home Cooking, originally from Pink Parsley

Ingredients:
1 3/4 cups chicken broth
1 cup long-grain white rice
2 tablespoons butter
1 medium zucchini, grated on the large holes of a cheese grater then wrung dry
1 cup shredded sharp cheddar
Salt and pepper, to taste

Directions:
1- Bring the broth to a boil in a medium saucepan. Stir in the rice, cover, and reduce heat to low. Cook 20 minutes, or until most of the liquid has been absorbed.
2- Remove from heat, add the butter and zucchini, and cover. Allow to stand 5 minutes, then stir to incorporate. Stir in the cheese, season liberally with salt and pepper, and serve.

Monday, June 16, 2014

Caprese Macaroni and Cheese


You guysssss.... I am in love with this pasta. I mean, yes, I've had cheesy pasta before, and I've had tomatoes and basil, so this shouldn't be so revolutionary but it is. It really, really, really is. Maybe it's because I went into it with low expectations, unsure of how mozzarella cheese would fair in mac and cheese, but low and behold it rocked. I made this to go with grilled chicken and it just stole the show. Sometimes when I make something I love I sit there praising myself and begin to feel I should work on being a bit more humble, but sometimes I think my praise is totally warranted and I should keep on keepin' on.

It's only mid-June so summer is just arriving and I am insisting that you make this at some point this summer. You'll thank me for it! Plus, it gives you an excuse to eat a heavy pasta dish mid-summer. I mean, what more do you need in life?

Source: Stephanie Cooks Original

Ingredients:
1/2 pound elbows
2 tbsp butter
2 cloves garlic
1 tbsp flour
1 cup whole milk
1/2 cup heavy cream
1/2 cup chicken broth
1 tsp garlic salt
Black pepper
1 1/2 cups mozzarella cheese, shredded
1 cup diced tomatoes
1/2 cup torn basil

Directions:
1- Cook elbows according to package directions.
2- In a large sauce pot melt the butter and garlic, stirring well. Add the flour, mixing, until a paste forms.
3- Slowly pour in the milk, cream, broth, garlic salt, and black pepper. Bring to a low, slow, boil.
4- Stir in mozzarella cheese and stir until melted.
5- Add the cooked elbows, stirring, until covered in cheese sauce.
6- Top pasta with diced tomatoes and basil.

Tuesday, May 20, 2014

Parmesan Garlic Oven Fries


John and I don't often eat at chain restaurants, but when we do one we both enjoy is Houlihan's. We are both huge fans of their spinach dip... and honestly, that's the only reason I go there. If I had to pick my last meal on Earth it would likely start with Houlihan's spinach dip. One time when we were there John got a side of their parmesan fries and I was in heaven. Technically they were John's, but I ate my fair share. He's a good man... he knows better than to not share with me!

I decided to make a version at home so it could be a bit healthier and more readily available. These were amazing. They are so easy to make- Landon even did a lot of the work to assemble them! It's such an easy side dish and has so much flavor. You can add fresh garlic too to give it more punch. I intended to but then Landon was a bit of a beast challenging at bedtime and I never got to it. Even without the fresh garlic they were amazing!

Source: Stephanie Cooks Original

Ingredients:
2 Russet potatoes, scrubbed
1 tbsp roasted garlic olive oil (or regular oil if you can't find it)
1 tsp garlic salt
Cracked black pepper
3 tbsp parmesan cheese
1 tbsp chopped fresh parsley

Directions:
1- Preheat the oven to 450.
2- Slice the potatoes into wedges. Rub with the olive oil.
3- Sprinkle with the garlic salt and pepper.
4- Bake for 35 minutes, flipping halfway through.
5- Remove from the oven. Cover in cheese and parsley.

Monday, April 14, 2014

Pineapple Salsa Rice


Sorry I disappeared last week! I was somewhat busy, but mostly lazy ::wink wink:: I did have one exciting event to share with you from last week though. I attended a pizza making class at a beautiful cooking studio and I will be sharing it with you later this week!

Onto the rice. I'll admit I'm not above convenience. I greatly prefer food cooked completely from scratch and I can taste the difference, but I grew up eating a lot of Rice-A-Roni type things and sometimes I just want them! For a long time whenever I made Mexican food I made Knorr's Mexican Rice. However, when I saw this recipe for pineapple salsa rice I knew it was time to say goodbye to my beloved mix and make a similar version from scratch. Honestly, this tasted like a healthier, less salty, and more flavorful version of the rice mix I so enjoy. John was raving about it and had the leftovers the next day for lunch, reporting that they were just as good the next day. Can't beat that!

Source: Slightly adapted from Good Thymes and Good Food

Ingredients:
1 tbsp. vegetable or canola oil
1/2 medium onion, diced
½ medium sweet bell pepper, any color, diced
1 tsp. kosher salt, plus more to taste
4 cloves garlic, minced or pressed
1 ½ cups chicken stock
1 cup prepared salsa
1 cup long grain white rice
1 cup fresh pineapple, diced
½ cup cilantro, minced

Directions:
1- In a medium saucepan set over medium heat, add oil. Once oil is hot, add onion, bell pepper, and salt and cook until softened, 5-7 minutes. 
2- Stir in garlic and cook for another 30 seconds. Stir in the chicken stock and salsa, cover and bring to a boil. Add in uncooked rice and stir. 
3-Reduce heat to low, cover and simmer until rice is tender, 20-25 minutes. (Check liquid level toward the end of cooking and add more chicken stock as needed.)
4- Stir in pineapple and cilantro, season to taste with additional salt.

Monday, January 6, 2014

Garlicky Potatoes Au Gratin


A few weeks ago we had a decent snow storm and were home bound for dinner. I was disappointed because we had plans to go out but the weather had different plans for us. That night I ended up making perfect roasted chicken with green beans and these potatoes. They were truly heavenly. Is there anything better than potatoes? Yes... there is... and it's potatoes covered in cheese. Painfully obvious, but felt the need to clarify that one ::wink wink::.

I ended up baking these much longer than needed because my chicken took for-e-ver so I kept taking the dish in and out of the oven. Due to this some of the yummy sauce dried up in the cooking process but none the less they were cheesy, smooth, and decadent. I love the way au gratin potatoes have a crisp top and a soft center. Landon was interested, he watched me serving them and asked to try them, but after a barely-there lick of the potato he tossed the plate aside and decided they weren't for him. Silly baby... but more for mommy and daddy.

Source: Stephanie Cooks Original

Ingredients:
2 large Russet potatoes
1/4 cup diced onions (I used frozen, you can use fresh if you prefer)
1 tbsp butter
1 tbsp flour
1/2 cup Philadelphia Roasted Garlic Cooking Creme
1 cup whole milk
1 cup shredded cheddar cheese
Salt and pepper

Directions:
1- Preheat the oven to 400.
2- Scrub the potatoes. Using a mandolin slice the potatoes into thin even slices. Place in an oven safe baking dish.
3- In a large skillet combine the onion and butter. Cook over medium heat until the onions are soft. Stir in the flour and stir until well combined.
4- Add the cooking creme and milk, heating over medium heat until a low gentle boil begins. Add the cheese and stir well until smooth. Season with salt and pepper to taste.
5- Pour the sauce mix over the potato slices. Bake uncovered for about 1 hour. The top should be golden and crisp.

Monday, December 9, 2013

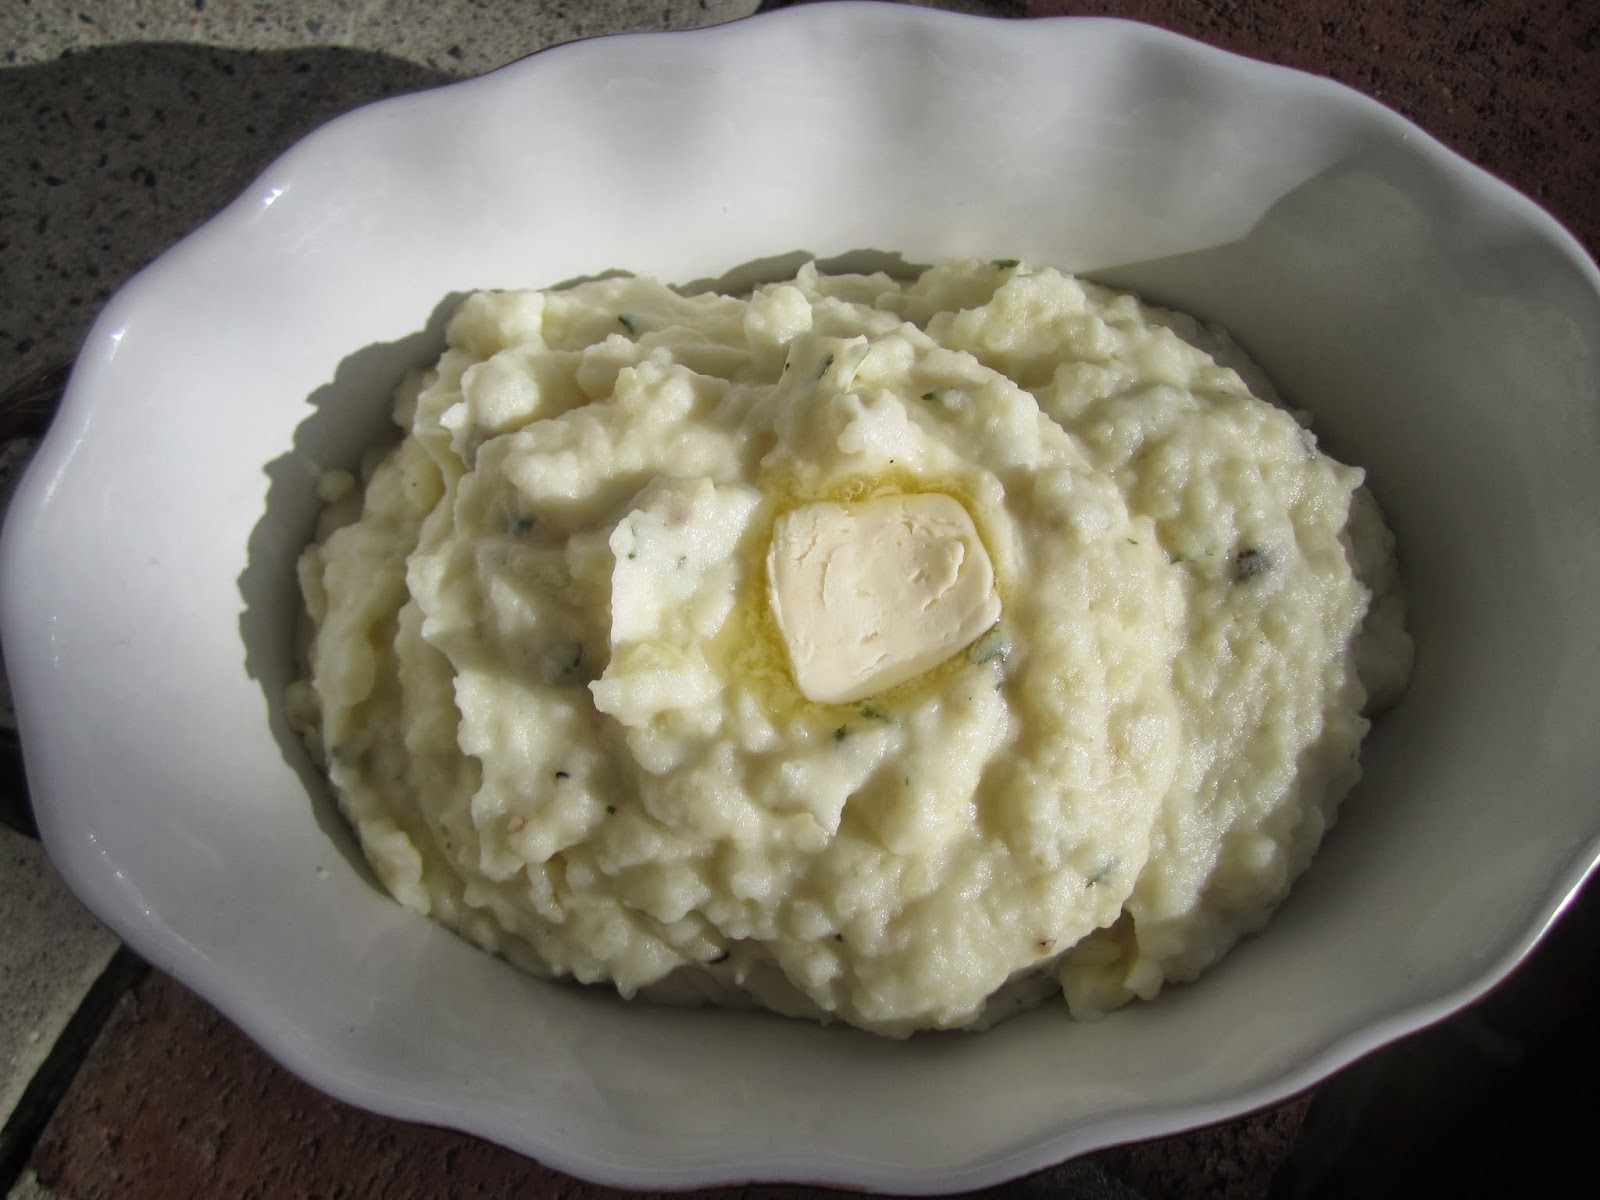
Make Ahead Mashed Potatoes (Crock Pot)


**Pardon the lousy photo- I took this in a rush on Thanksgiving, it's the best I could do!**

A few years ago my parents signed up to make the mashed potatoes for Thanksgiving and came with them in the crockpot to be kept on "keep warm" until dinner. I don't know what that idea had never crossed my mind but it hadn't and as soon as I saw that I knew that would be my preferred method for Thanksgiving going forward. Sometimes mashed potatoes can get thick and gross when made ahead but I found this method really keeps them perfectly moist. This year was my 5th year hosting Thanksgiving and I have to say it finally came perfectly with ease. The first two years I did too much- think personalized cookies for place seatings, gift boxes with ornaments to hold the leftovers, etc. I just did TOO MUCH. This led to an insane amount of stress. Then two years ago I was extremely pregnant (I had Landon 4 days after hosting Thanksgiving!), last year I had a baby, and this year I have a toddler. Needless to say my amount of effort has gone down (..dramatically...) and yet I'd argue the meal has gotten better. Sometimes less is more... and a less stressed host is definitely a positive.

So back to the potatoes. In my efforts to get as much done ahead of time as possible I made these the morning of Thanksgiving and put them in the crockpot on keep warm for about five hours. They were delicious and having one thing done, cooked, and hot before I even put the turkey in was a bonus!

Source: Recipe adapted from Bon Appetit

Ingredients:
5 pounds Russet potatoes (or a mix of Russet and yukon gold), peeled and chopped
1 cup whole milk
1 cup heavy cream
1 stick butter
1/2 cup sour cream
1 tsp garlic salt
Fresh ground pepper

Additional butter for greasing the crockpot

Directions:
1- Place potatoes in a pot. Cover with water. Boil until soft.
2- Once cooked soft, drain and set aside. In the pot combine the milk, butter, and cream. Heat over low. Add the potatoes to the pot and mash (either use a hand mixer or a masher... I like to mash by hand because I like them more rustic, but for creamier ones whip them).
3- Fold in the sour cream, garlic salt, and pepper.
4- If not serving immediately, grease the inside of the crockpot with butter. Add the potatoes. Cover and place on "keep warm" (NOT low) for up to 5-6 hours. Stir periodically. If it seems like it's thick add more milk (mine didn't get thick).

Monday, November 25, 2013

Skillet Focaccia Bread


Until recently I really feared working with yeast. I had done it several times in my life but it was definitely my least favorite kitchen project. After making cast iron pizza I became a convert and decided I needed to use yeast more. I recently found myself home unexpectedly for the day on a Sunday, our dinner plans cancelled, and no real meal plan in mind. I was craving cavatelli with marinara but wanted to make something to "spice" up dinner and make it more fun. Enter this focaccia.

I started out with intentions of making a loaf of Italian bread but stumbled upon this and decided I needed it in my life. Anything I can make in my Le Creuset skillet becomes an instant favorite so I was sold. This came together so easily, really taking minimal effort, and the bread was incredible. I followed the original recipe to a T but next time I might mix up the toppings. I love oven roasted tomatoes and shaved parmesan baked into focaccia so I can pretty much assure you that'll be my next rendition. John and I both loved this bread- John even ate it with just about every meal for the following two days. Landon, however, wouldn't even try it which is so odd since typically he sees bread and he is so sold! Toddlers... the least predictable species on the planet.

Source: Crunchy Creamy Sweet

Ingredients:
3/4 c warm water
1/2 tsp granulated sugar
1 1/2 tsp yeast
2 Tbsp olive oil
2 c all-purpose flour ( divided )
1/2 tsp salt

For the parmesan butter brush:
3 Tbsp unsalted or salted butter, melted
2 Tbsp grated parmesan
1/2 tsp Italian seasoning

Directions:
1- Place water and sugar in a large mixing bowl of a stand mixer. Stir until sugar dissolves.
2- Sprinkle yeast over the water and stir few times. Let sit until foamy ( about 5 minutes).
3- Turn the mixer on low speed and add 1 cup of flour and salt. Mix until combined.
4- Add oil and mix well.
5- Gradually add as much of the remaining cup of flour as you can ( it can be only 3/4 of it) and mix until the dough pulls away from the sides of the bowl.
6- In the meantime, preheat the oven to 220 degrees F and when it's ready turn it off. Keep the door closed.
7- Grease the skillet (I used olive oil).
8- Place dough onto a floured surface (use the remaining flour from the second cup) and fold the dough few times until you feel it's smooth and not sticky anymore. Shape into a ball.
9- Roll out the dough into a size of your skillet.
10- Place in skillet. Stretch up the sides. Cover with a kitchen towel and place in the oven for 20 minutes.
11- Take the skillet out of the oven and preheat the oven to 400 degrees F. Make indentations in the dough with your fingers.
12- Mix melted butter, parmesan and seasoning in a small bowl. Brush the dough with half the butter.
13- Place skillet with dough in the preheated oven and bake 20 minutes, or until golden brown. Brush with remaining butter. Let cool until safe to the touch and slice. Serve.

Monday, November 4, 2013

Roasted Parmesan Oregano Potatoes


I love oven roasted potatoes a little too much. I don't make them often because I really have minimal self-control when they're around. When Cassie posted this recipe I was so psyched because anytime you combine cheese with potatoes it's a total win. These come together quickly, baked up deliciously, and are very versatile and easy to make. Landon was skeptical of them, which isn't shocking since he's skeptical of basically all food, but after he requested "ket-up" (or ketchup as most of us call it) he was eager to dig in. Yet another winning recipe from Cassie... she never steers me wrong!

I should mention I made 1/3 of the recipe but kept the cheese the same as the original recipe linked below. We love cheese in this house! If I were to make the whole recipe I'd probably up the cheese...because, well... cheese makes life better.

Source: Cassie Craves

Ingredients:
3 pounds baby red potatoes, chopped
1 1/2 teaspoons salt
1 teaspoon pepper
1 teaspoon dried oregano
1 teaspoon garlic powder
1/4 cup shredded parmesan cheese
1/4 cup olive oil

Directions:
1. Preheat the oven to 475 degrees.
2. Arrange the potatoes in a single layer on a large baking sheet. Sprinkle with salt, pepper, oregano, garlic powder, and parmesan cheese. Drizzle with olive oil and use your hands to spread the seasonings and oil evenly over the potatoes.
3. Bake for 25 to 30 minutes, flipping occasionally, until browned and crispy.

Thursday, October 3, 2013

Cheesy Garlic Shells


This recipe was born out of necessity. It was late, I wanted macaroni and cheese with some extra pizzazz, and I was debating making a box of Annie's with just some garlic powder but at the last minute I decided to get a bit "fancier" (think American cheese slices... I told you I am a "fancy" girl!) Honestly I am so glad I decided to make this because it ended up being incredible. John and I were both huge fans. Next time I make it I'll have to make it when Landon will be having dinner with us since he's an American cheese junkie. Overall this is super easy to make and yields delicious results! The cheese is so creamy and mild, allowing the garlic and seasonings to shine.  It stays a little "saucy" so it's not dry or thick like mac and cheese can sometimes get. We loved it. I am sure you'll see it in a recap post soon since we loved it so much!

Source: Stephanie Cooks Original

Ingredients:
2 cups milk
1 1/2 cups dry medium sized shell pasta
1 tsp garlic salt
1/2 tsp onion powder
1/2 tsp Italian seasoning

1/4 lb white american cheese slices

Directions:
1- Combine the milk, pasta, garlic, onion powder, and Italian seasonings together in a pot. Heat over low-medium heat, until the liquid comes to a very low boil. Allow to cook over a slow/low boil. Do NOT let it boil rapidly or the milk will curdle. 
2- Once the pasta is soft and most of the milk is absorbed, break apart the cheese slices and add to the pasta. Stir well. Serve hot

Thursday, September 5, 2013

Cheese Stuffed Breadsticks


As I sit down to write this post I can already tell you it's going to be short. I started teaching again this week and I am exhausted. On top of the back to school routine setting in I feel horribly sick today, so don't mind my pity party for one, but I am keeping things short. I have been meaning to share these delicious breadsticks with you because they are seriously heavenly. Straight up heaven. When I made them I served them with just a simple pasta and salad, and honestly I should have just done salad because John and I were all about the breadsticks. I ate one, took a bite of a second and then gave it to John, and literally I said "I instantly regret giving you that..." because it was so good I didn't want to share. You must try these. They are so delicious and so easy to make!

Source: Adapted from Weary Chef

Ingredients:

2¼ cups baking mix (like Bisquick), plus a little for dusting
⅔ c. milk
1 tsp. Italian seasoning
½ tsp. kosher salt
1/2 tsp garlic powder
1/2 tsp parsley
2 tbsp. olive oil
8 pieces of string cheese

Directions:
1- Preheat oven to 450 degrees.
2- Stir together baking mix, Italian seasoning, and salt. Add milk, and stir to combine.
3- Generously dust work surface with baking mix. Turn out dough, and knead about 15 times. Shape into a ball, then roll into a ¼” thick rectangle.
4- Cut dough into 8 smaller rectangles. Place a cheese stick in the center of each piece of dough, and fold the dough around the cheese. Stretch the dough as needed to entirely cover the cheese, and squeeze the entire breadstick, including the ends, to seal all edges.
5- In a small bowl combine the garlic powder, parsley, and oil. Brush the mixture over the breadsticks.
6- Place on a baking sheet and bake for 12-15 minutes, until lightly golden.
7- Serve with sauce. (Warning- the cheese will be hot, so allow to cool a bit before biting in).

Monday, August 12, 2013

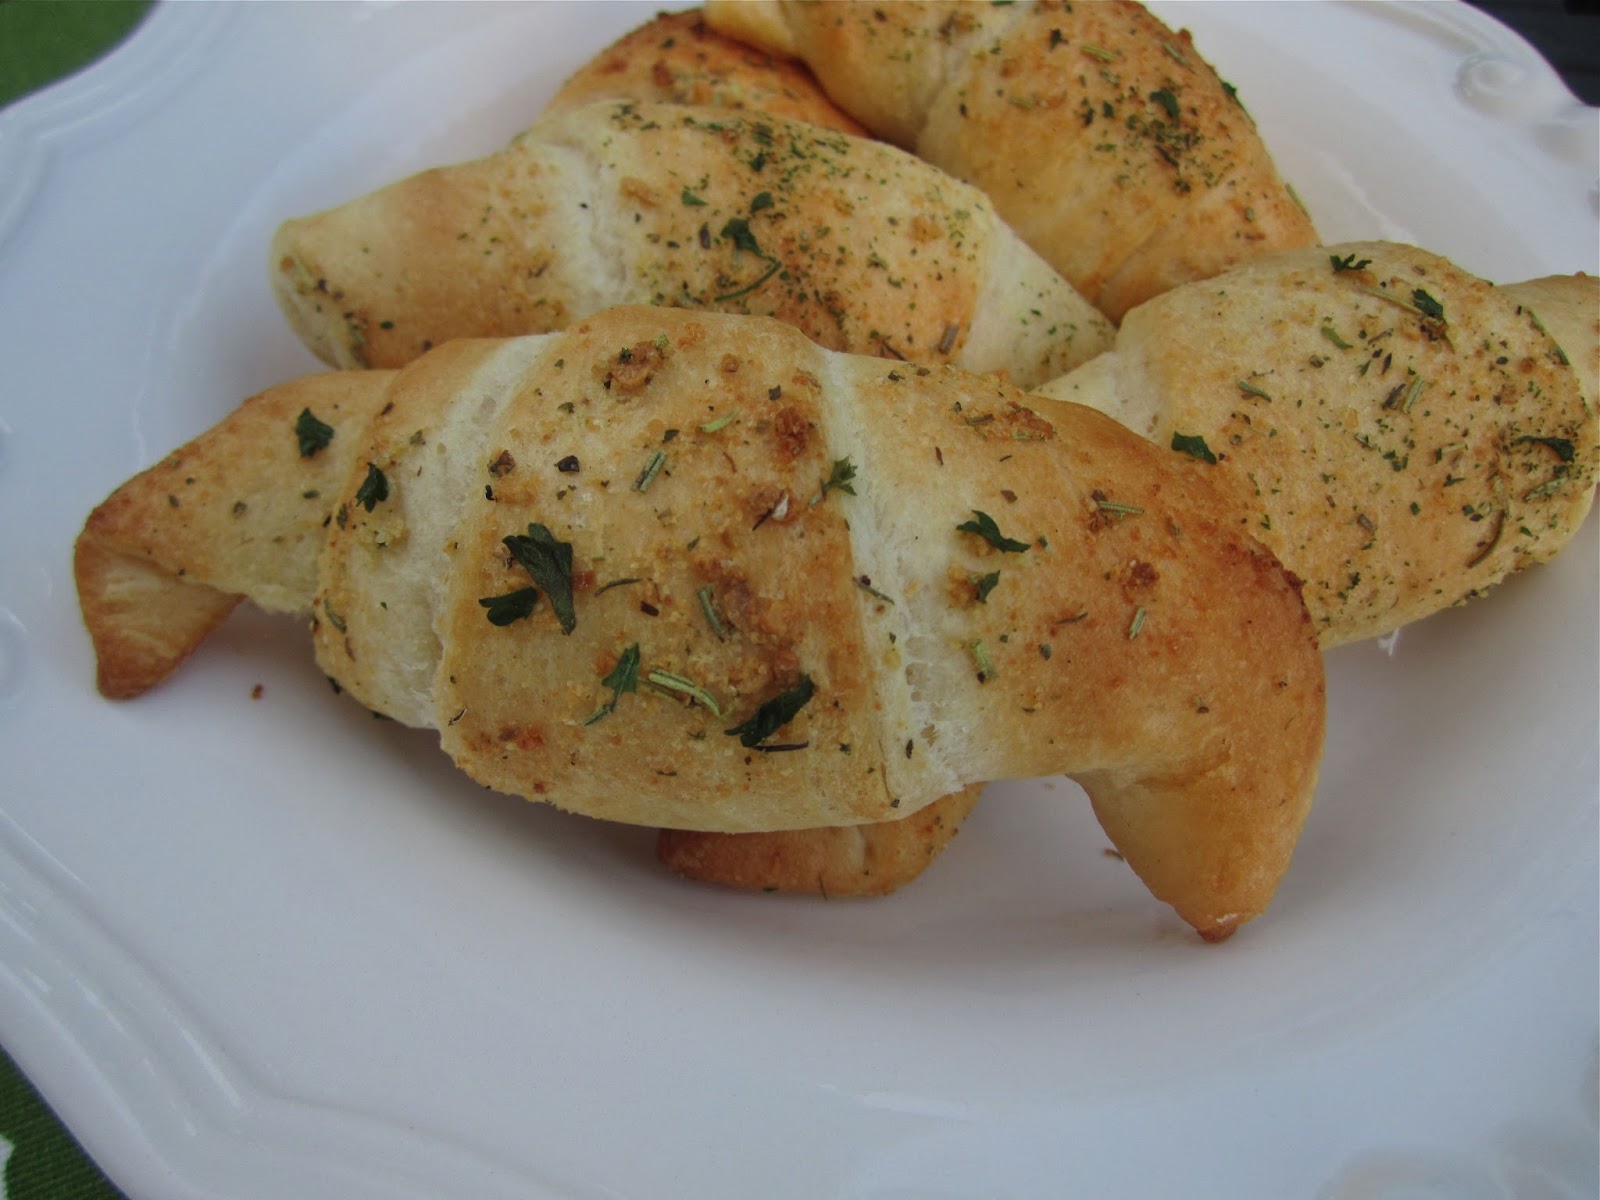
Italian Crescents


Let me just tell you, my husband can completely kill a can of crescents on his own. I mean, I can make them, walk away, and he'll be done... fast. So the other day when I found a can in my fridge that had originally been bought for some purpose that I've forgotten (yet another meal plan item I didn't make I suppose!) I decided to use them to make a simple side dish. This was similar to a garlic bread type of roll, and it was truly delicious. I managed to sneak one or two away from John before he housed them all! Try these- you can easily substitute any seasonings you prefer for what I used and make a delicious side dish.

Source: Stephanie Cooks Original

Ingredients:
1 tube reduced fat crescents (or regular)
1/4 cup Parmesan cheese
2 tbsp melted butter
1/2 tsp garlic powder
1/4 tsp Italian seasonings
1/4 tsp parsley
Salt

Directions
1- Preheat the oven to 375.
2- Roll the dough out into 8 triangles. Evenly sprinkle the cheese over each triangle.
3- Roll up into crescent shape.
4- Meanwhile, combine butter and seasonings.
5- Use a pastry brush to brush butter over all rolls evenly.
6- Bake 8-10 minutes or until golden.


Monday, August 5, 2013

Buffalo Chicken Pasta Salad


Buffalo sauce is John's favorite flavor. He would seriously try anything if it was coated in wing sauce. When I saw this recipe for pasta salad on Pinterest I knew I had to try it for him. It combined some of his favorite things in life- pasta salad and buffalo sauce, how could it go wrong? Just as I expected, this was a total hit with John. I actually didn't have any. I don't know why, but after I made it I had a total food aversion to it. I'm strange like that, ever since I was a little kid I'd get randomly grossed out by certain things, and sure enough this happened after I made this salad. I'm kind of sad about it because it looked so good and John swore it was amazing, eating it for lunch a couple times after having it for dinner. I'll have to try it again so I can actually taste it!

Source: Adapted from Flying on Jess Fuel

Ingredients:
1/2 pound pasta, cooked, drained and cooled
1 cup chicken breasts, cooked and cubed
1 green bell pepper, diced (or use celery- I strongly dislike celery so I went with bell peppers)
1/2 cup shredded carrots
3 tbsp diced red onion
1/2 cup ranch dressing (blue cheese works too)
1/4-1/2 buffalo sauce (depending on how hot you want it)

Directions:
1- Combine all ingredients. Toss well. Allow to sit in the fridge all together for at least one hour before serving. 
2- If it looks too dry and like too much sauce absorbed in the fridge, add additional ranch/buffalo sauce to taste and stir well before serving.

Monday, July 22, 2013

Creamy Mushroom Noodles + a GIVEAWAY!!


Everyone defines healthy differently. To some healthy is low carb, to others it's low fat, and to others it's all natural. I tend to fall in the last category. I might eat cookies, but they are usually homemade and made with real ingredients rather than chemicals and artificial junk (although I do love Oreos... so... you know...) When I was contacted by the people of Better Than Bouillion I was excited to see their products. Landon is a big fan of that fake chicken taste that can only be achieved with bouillon, but I was reluctant to use it until I found this product. I've been using it for over a month now and really am a fan. They were kind enough to send me three jars and I've tried and enjoyed all three (vegetable, chicken, and mushroom).

I wanted to use this product to recreate one of my favorite "junk foods." Pasta sides is a product I loved as a kid but now that I cook a lot I don't find it as appealing. I tend to find the flavors fake tasting. I wanted to try to recreate my favorite- the chicken noodles- but from scratch. Does this taste like that? Not really. But was it good? Oh yes- very. We all loved it and enjoyed this. It takes minimal effort and is full of flavor.

Best of all- two of you will get to win FIVE jars of your choice of this bouillon! I'm going to pick one winner from the blog comments and one winner from facebook. Do you follow me on facebook? If not please like my page for your second chance to enter!

To enter, leave a comment on this post telling me which flavor you'd most want to try. They have Au Jus Base, Beef Base, Chicken Base, Chili Base, Clam Base, Fish Base, Ham Base, Lobster Base, Mushroom Base, Turkey Base, and Vegetable Base. One entry per person. Your comment will not appear immediately since I monitor comments. For your second entry please go to my facebook page. Contest ends Wednesday at midnight! Please be sure to leave your email in the comment!

Source: Stephanie Cooks Original

Ingredients:
1/2 pound egg noodles
1 tsp olive oil
1 tsp butter
1/2 cup mushrooms, diced
1 tbsp flour
1/3 cup marsala wine
1.5 cups broth
1 tsp chicken bouillon
1 tsp tomato paste
1 tsp garlic powder
1 tbsp parsley

Directions:
1- Cook egg noodles according to packaging directions.
2- In a skillet, combine the oil and butter and heat over medium heat. Add the mushrooms and saute until they start to get soft. Cover with the flour and stir, cook about 1 minute. 
3- Turn the heat up to high. Add the marsala wine to deglaze the pan. Stir in the broth, bouillon, tomato paste, garlic powder, and parsley. Cook over high heat until the sauce starts to thicken. Add the noodles and continue to cook over high heat until all the liquid is absorbed. 

Wednesday, July 10, 2013

Corn and Barley Salad with Fresh Tomato Vinaigrette

Since I've had my grill I've been making tons and tons of meals outside on that bad boy. A few nights ago I was grilling steaks and wanted a simple and light side dish. I decided to go with this corn and barley salad I had seen on Pinterest. The original recipe  had the most amazing photographs of a delicious piece of grilled chicken served over this incredible looking salad. I had never worked with barley before but decided to give it a shot because the pictures were calling me- well, haunting me actually- it was all I could think about. I had the original recipe including the chicken on the menu for two weeks but it kept getting bumped by things happening, the tomatoes being rotten once (boo), and just general laziness on my part! Finally I got around to it and I'm so glad I did.

John and I were both huge fans. I left out the avocado because neither of us are big avocado people but I know most people love it so I will include it in the recipe. I have to say this is the perfect summer side dish. You can serve it warm or cold, you can make a big batch of it for a party, or you can make a smaller batch for dinner. We loved it and I am confident you will too!

Source: Adapted from Iowa Girl Eats

Ingredients:
1/2 cup medium barley
1 cups fresh, canned, or frozen-then-thawed corn kernels
1/2 cup cherry tomatoes, diced
1/4 cup minced red onion
1/2 avocado, chopped (optional)
salt & pepper

Vinaigrette:
1/2 cup halved cherry tomatoes
1 clove garlic
1 Tablespoon extra virgin olive oil
1 Tablespoon water
1 Tablespoon red wine vinegar
1/2 Tablespoon lemon juice
1/2 Tablespoon red onion
salt & pepper
Parsley

Directions:
1- Cook barley with a pinch of salt according to package directions. Drain when barley is tender to make sure all excess water is removed. Place into a large bowl to cool slightly.
2- Make the Tomato Vinaigrette: Combine all vinaigrette ingredients in a food processor or blender, then process until smooth.
3- Stir corn, cherry tomatoes, and red onion into the cooled barley. Stir in the tomato vinaigrette to taste. Gently fold in avocado (if using) then season with salt & pepper to taste.

Tuesday, June 25, 2013

Grilled Veggie Skewers with Balsamic Lemon Drizzle


John and I have been in our house for 4.5 years. This is our fourth summer in this house and we just got a grill this past week. Can you believe it?! I can't. Growing up my dad grilled year round. I have distinct memories of him out grilling in the snow- nothing held him back. And yet getting a grill here just never happened! That first summer we passed because we had so many big expenses in the new house, and then before you know it we were just used to life without one. In the past week I've cooked on the grill twice and I seriously don't know how I lived without it. Prepare to see many grill-friendly meals coming your way!

These skewers were part of the Father's Day BBQ we had (hence the less than stellar picture- I was rushing to feed a crowd). I hate making green salad for parties because I feel like it never gets eaten. I decided to make these skewers so there were fresh veggies but in a more appealing way. Give this a shot- it's truly so easy and so delicious!

Source: Stephanie Cooks Original

Ingredients:
2 zucchini, cleaned and sliced
1 yellow squash, cleaned and sliced
2 bell peppers, cut into chunks
1 pint of cherry tomatoes
1 Tbsp olive oil
1/2 tsp Italian seasonings
1/2 tsp rosemary

Drizzle ingredients:
3 Tbsp balsamic vinegar
2 Tbsp olive oil
1 Tbsp lemon juice
1 tsp Italian seasonings

Directions:
1- Assemble veggies on skewers. If using wooden skewers be sure to soak them at least 10 minutes in cold water prior to assembling to prevent them from burning.
2- In a small dish coming the olive oil, Italian seasonings, and rosemary.
3- Using a basting brush brush the oil over the veggies.
4- Grill until all veggies are softened and cooked.
5- Meanwhile, combine the balsamic, olive oil, lemon, and Italian seasonings. Once the skewers are cooked, drizzle the dressing over top. Serve the extra dressing on the side for those who want more.

Tuesday, April 9, 2013

Toddler Tuesdays: Cheesy Sweet Potato Nuggets


It's been a few weeks since my latest Toddler Tuesdays post! But here we are again!

If you read my blog regularly you'll remember in my March re-make recap post that I mentioned Landon's been on a hunger strike. Since March 14. Yes, I'm keeping track. He BARELY eats lately, which is an issue since he's already being monitored by a team of specialists for his lack of growth. I am constantly trying to find foods he'll eat. One of the few foods I can usually get in him is sweet potatoes. And cheese. Sometimes lots of cheese. Sometimes none. It's a fun game we're playing! But anyway, I knew I needed to make something that would entice him so I decided to make some type of breaded sweet potatoes. I took his favorite food (sweet potatoes mashed with butter and milk), added cheese, and breaded it. Voila! Recipe for toddler success. It took 15 minutes from start to finish to make these and it's much healthier than anything you can find in the freezer. Try these- you and your tots will love them.

Side note- you could bake these. I fried them because Landon is under strict orders to gain weight. If you want a healthier option, bake them until golden. You could also make large batches and freeze them after frying/baking for later use.

Source: Stephanie Cooks Original

Ingredients:
Vegetable oil
1 large sweet potato, cooked and peeled
2 tbsp milk
1 tbsp butter
1/4 cup shredded cheddar cheese
1/4 cup bread crumbs

Directions:
1- In a large skillet heat the oil (enough to cover the bottom of a pan).
2- In a bowl mix the hot sweet potato, milk, and butter. Mash with a fork until evenly combined. Add in the cheese. Stir well.
3- Take bite sized portions of the potato and roll into balls. Roll the balls in the bread crumbs and place on a dish.
4- Once all nuggets are formed place the balls in the oil, cook until browned. 

Monday, December 10, 2012

Parmesan Paprika Potatoes


Potatoes are a source of contention for me. You see... I don't want the five pound bag of spuds. We're 2.5 people- and the .5 doesn't always eat what we eat. So five pounds of potatoes is useless. However, if I buy us the loose potatoes and get the appropriate amount, it's either more expensive or only cheaper by about $.20. So I stand there having an internal debate, "Save money and get more food? Seems like the obvious choice! Well... they'll just rot, and that's wasteful. No, no, this time I'll be good! I'll use them all before they grow so many nubs they look like trees... I will! No you won't, you never do... just buy 3 potatoes!" And this repeats. The outcome differs depending on my mood, but recently I caved and bought the big ol' bag. So there they sit- taunting me- daring me to make potatoes. And so I did. I made these parmesan paprika potatoes and they were incredible. Not just good, but excellent. I loved the smokey taste of the paprika with the sharp tang of the parmesan. Total winner!

Source: What's Gaby Cooking?

Ingredients:

4 cups cubed Yukon Gold potatoes
3 tbsp olive oil
1 tsp garlic salt
1/2 tsp salt
2 tsp paprika
1 tsp pepper
4 tbsp Parmesan cheese

Instructions
1-Preheat your oven to 425 degrees.
2- Place the cubed potatoes into a baking dish. (The cubes of potatoes should be about 3/4 of an inch on all sides) You can spray the baking dish with a baking spray too to eliminate anything possibly sticking
3- Pile on the olive oil, garlic salt, salt, paprika, pepper and Parmesan cheese. Using your fingers (or spoon) get in to the potatoes and carefully mix everything around until the seasonings coat each potato.
4- Transfer the baking dish into the oven and bake for 30 minutes. Remove from the oven and toss the potatoes with a pair of tongs. Put the baking dish back into the oven and bake for about 15 - 25 minutes more until they are golden and crispy.
5- Season with an little dusting of sea salt if desired and serve.

Monday, November 12, 2012

Broccoli with Cajun Garlic Butter


Well, hello there friends! It's been quite some time, hasn't it? John and I were without power for 11 (very long) days due to Hurricane Sandy. We were living with John's parents during that time and I just didn't have the time or energy to cook or blog. But I am back! And my triumphant return comes with... broccoli. Lame, I know! But I swear this is GOOD broccoli. You see, I thought about bringing you one of the fun desserts I have on deck to share, or a new chicken sandwich... but it's been so long since I shared a veggie side, so the broccoli wins. It's nicely seasoned, has a lot of flavor, and went great with the meal I served it with (coming soon!) Come back Wednesday and I'll share a decadent dessert to make up for my big return to blogging being broccoli, I promise!


Source: Cassie Craves

Ingredients:
1 bag frozen steam-in-a-bag broccoli (or 2 heads broccoli, chopped into florets and steamed without salt)
2 tablespoons butter
3 cloves garlic, minced
1 teaspoon Cajun seasoning

Directions:
1. While the broccoli is steaming, heat the butter in a small skillet over low heat. Add the garlic and continue to cook over low heat until fragrant. Add the Cajun seasoning and stir until it's fully incorporated.
2. Place the broccoli in a large bowl and pour the warm butter mixture over it, tossing gently to combine. Serve immediately.

Thursday, June 28, 2012

Pesto Ranch Potato Salad


Please don't disown me, or stop reading my blog, or call me a horrible person... what I'm about to say might shock you... but I just CAN'T eat traditional potato salad. You know the kind... glopped in mayo.. all white and thick and heavy. If you saw my face right now you'd understand (picture me looking queasy)... I just can't do it. First of all- mayo makes me gag. Yes, I can eat things cooked with mayo, like bang bang shrimp or spinach dip (though I do use far less mayo than the recipe calls for), but I CAN'T add it to a sandwich or eat anything where mayo is the starring ingredient. So when we decided to host a Father's Day barbecue I knew I should serve a potato salad, but I knew I'd have to make my own version. I decided to do a more Italian version and came up with this. I made the mistake of serving it cold, it's definitely better at room temperature, but either way it was tasty! If you're making this definitely serve it slightly warm or room temperature, the flavors aren't as strong when it's cold. This will be great for all of the summer picnics and BBQs coming up!

Source: Stephanie Cooks Original

Ingredients:

1 pound small red potatoes, diced into small, even parts
1 cup sun dried tomatoes, sliced into thin slices
1/3 cup pesto
1/3 cup ranch
1 tsp Italian seasoning
Salt and pepper

Directions:
1- Bring a pot of water to a boil. Cook the potatoes until fork tender, drain and run under cool water to stop the cooking process.
2- Add the potatoes to a mixing bowl- toss in the tomatoes, stir well.
3- In a small bowl combine the pesto, ranch, Italian seasonings, and salt and pepper to taste. Stir well.
4- Pour the sauce over the potatoes, mix well. Refrigerate until ready to serve. Serve at room temperature.