Showing posts with label chicken. Show all posts

Sunday, December 31, 2017

Lemon Chicken Orzo with Broccoli and Tomato


Ohhhhh....heyyyyyy! It's been... what? 8 months? Well, in those months life has gone on and I had basically decided I was done blogging. I "didn't have time" for this anymore and wasn't really passionate with the experience. However something changed and I'm back!

You see, I posted years ago about my experience with postpartum depression. To treat this I was placed on medication and this medicine led me to gain 30 pounds in the course of 3-4 months. I tried, desperately to lose the weight but couldn't. I then gave up and tried to accept that this was "just me" now. I tried hard to go off the medicine about a year ago but it was too soon. Two months ago I finally went off the medicine and am ready to tackle this weight that came with the medicine (and 15 pounds left over from my kids... so.... we've got a long trip ahead of us!) I rejoined Weight Watchers on December 8 and am down 8 pounds in three weeks! I've been making tons of great healthy recipes and really needed to start blogging again so I have a place to store them!

This recipe comes from Emily Bites, one of my all time favorites for WW recipes. I didn't modify her original recipe at all except to exchange asparagus for broccoli. I'm so excited to be back in the kitchen, back blogging, and back on the voyage of getting back to "me".

Source: Emily Bites

Makes 4 servings (1 1/2 cups per serving)- 6 Freestyle SP

INGREDIENTS:

4 teaspoons all-purpose flour
½ teaspoon garlic powder
½ teaspoon black pepper
½ teaspoon salt
1 lb boneless, skinless chicken breast, cut into bite-sized pieces
1 tablespoon olive oil
1 tablespoon light butter (I used Land O’Lakes)
6 oz uncooked wheat orzo pasta
2 garlic cloves, minced
2 cups reduced sodium fat free chicken broth
1 cup fresh broccoli, chopped
3 tablespoons fresh lemon juice
1 cup halved grape tomatoes
Additional salt to taste

DIRECTIONS:

1- Combine the flour, garlic powder, pepper and salt in a small dish and stir to combine. Place the chicken pieces in a gallon zip-top bag and add the flour mixture. Seal the bag and shake/massage it around until the chicken pieces are coated.
2- In a large saute pan, bring the oil over medium heat and then add the chicken. Stir to coat with the oil and then cook, stirring occasionally, until the chicken pieces are cooked through and begin to brown. Transfer the cooked chicken to a side plate and cover with aluminum foil to keep warm. Wipe out the inside of the skillet.
3- Place the skillet back over medium heat and add the butter. When the butter is melted, add the orzo to the pan and stir to coat. Spread the orzo across the surface of the pan and allow it to cook for 2 minutes until a few of the orzo pieces begin to brown. Add the garlic to the pan and stir. Allow to cook for another minute.
4- Add the chicken broth to the pan and bring it to a boil. Reduce the heat to low to simmer and cover the pan. Simmer covered for 4-5 minutes and then add the broccoli and tomatoes. Stir and re-cover. Simmer for an additional 10 minutes. Remove from heat and stir. Add the lemon juice, with salt to taste. Stir together and then add the reserved chicken to the pan. Stir to combine and serve.

Tuesday, April 25, 2017

Creamy Italian Chicken Rolls


Let's start off with saying these should totally be called "ranch chicken rolls" but I got to the grocery store, saw I had written ranch on my list but had no idea why I wrote it, and bought creamy Italian instead. I got home and saw I planned to make these (originally with ranch) and was bummed! But, we improvised people, we did. And by "we" I mean *I* improvised, while Landon told me it looked "gross" and Emmie begged for yogurt, bananas, and anything BUT what I was making. 

John loves "stuff wrapped in flaky pastry" (I think that's the scientific term for these things...) so I knew he'd love these. Tuesdays are easily my busiest day and since I'm just getting back into the groove of cooking these were a perfect meal option. I'm not gonna lie, these were super messy in the assembly process, but the end result was delicious. The dough wasn't really holding in the filling but I just pinched it together as best I could and they baked up beautifully. Best of all, this is the essential "semi-homemade" meal that I am able to make during the crazy weeknight routine. 

Source: Adapted from Pillsbury

Ingredients:
1 roll of crescent rolls
Creamy Italian salad dressing (can sub ranch)
1.5 cups cooked chopped chicken (I used rotisserie)
1/2 cup shredded Mexican cheese blend
2 tbsp chopped green onions

Directions:
1- Preheat the oven to 375.
2- Roll out your crescent dough. Press the seams together to make one large sheet of dough.
3- Top with the dough with a thin, even layer of creamy Italian salad dressing.
4- In a bowl mix the chicken, cheese, and green onion. Add a tbsp of dressing and stir the mixture well.
5- Top the dough with the chicken mixture. Roll up long side in. Slice. Transfer the rolls to a cookie sheet topped with a silpat.
6- Bake about 20 minutes, until rolls are golden and cheese is melted. Serve with additional dressing.

Tuesday, April 18, 2017

Chicken Ramen Bowl


Let me tell you, you guys are the absolute best. The BEST. When I posted on my blog's facebook page that I was coming back and about my struggles you were so supportive. It made my day! It also made me more accountable. Today was day 2 of me trying to cook more. As I was driving home from work (late... I have meetings on Tuesdays, got stuck at a broken train, detoured into stand-still traffic, you get the deal) I was so tempted to just throw a frozen pizza in the oven or grab takeout. Habits, particularly bad ones, are not easy to break. But... I didn't. And that my friends is a victory.

Evenings are hard for me. I get home with the kids around 4:30 (5:30 on Tuesdays) and my daughter is in bed by 6:30. That leaves me 1-2 hours to get both kids fed, bathed, etc. This time crunch has been one of the main reasons I've stopped cooking. By the time I unpack school bags, lunch boxes, art projects, and get the kids fed, I just am DONE. But I pushed through, and boy am I glad I did.

This was delicious. Better than I expected quite frankly. I didn't have many of the ingredients in the original recipe (that's what happens when you don't cook for a year!) so I made do with what I had and it was totally awesome. Best of all I got it on the table within 20 minutes. Woo hoo!

Source: Adapted from So Tasty So Yummy

Ingredients:
1/2 pound chicken breasts, cut into small pieces
1 tbsp olive oil
Salt and pepper
1 cup broccoli
1 bell pepper, sliced thin
2 packets of ramen noodles (I used the soup and just tossed the seasoning packet)
1 tsp corn starch
1/2 cup chicken broth
2 tbsp garlic teriyaki sauce
2 tsp rice wine vinegar

Directions:
1- In a skillet heat the oil. Season the chicken with salt and pepper. Cook until light brown and cooked through. Remove to a dish and cover.
2- Bring a pot of water to a boil. Add the broccoli for 2 minutes. Remove the broccoli with a slotted spoon (do NOT drain the water). Add the ramen to the water and boil for approximately 3 minutes.
3- Meanwhile, add the broccoli and peppers to the skillet. Sprinkle with corn starch and stir well. Add the broth, teriyaki sauce, and vinegar. Heat over medium heat.
4- Add the pasta and chicken back in to the sauce. Allow to heat and stir to coat the noodles.
5- Serve hot.

Monday, January 25, 2016

Chicken Fajita Pasta


No lies... I made this so long ago I'm not even sure if it was pre-Emmie or post-Emmie, but it's been a long time. I do remember that whenever I made it I sat there eating it and thinking, "Why don't I cook more often? Gosh, I miss the days when I cooked regularly!" It was just so delicious. John and I both love fajitas and love pasta so I knew it had to be a winner. And, if I'm being honest, anything with campanelle pasta peeks my interest because it's easily my favorite shape. Is that weird? I mean I know it all tastes the same, but some are just more enjoyable than others. But with that said, this is flavorful, slightly creamy, and delicious. Make it soon!

Source: Slightly adapted from Kevin and Amanda

Ingredients:

2 tablespoons olive oil
1 pound boneless, skinless chicken breasts
1 envelope (3 tablespoons) taco or fajita seasoning
1 cup diced onion (about 1/2 onion)
2 cups diced bell peppers (2-3 bell peppers)
3-4 cloves garlic, minced
2 cups low-sodium chicken broth
½ cup heavy cream
1 (10-oz) can Ro-Tel Diced Tomatoes and Green Chiles
8 oz (about 3 cups) pasta
½ teaspoon salt

Instructions
1- Cut the chicken into bite-sized pieces. Season with half of taco seasoning. In a 12-inch skillet, heat 1 tablespoon olive oil over high heat. 
2- When the oil is very hot, carefully add the chicken in a single layer and cook without stirring until one side is seared and browned, about 1-2 minutes. Flip the chicken to the other side and cook until browned. Remove the chicken to a plate and set aside.
3- Add the remaining 1 tablespoon of olive oil to the skillet with the heat still on high. When the oil is very hot again, add the onions, bell peppers, and remaining taco seasoning. Cook, stirring occasionally, until the veggies are slightly blackened. 
4- Turn heat to low, add minced garlic, and stir until fragrant and well combined, about 30 seconds. Remove the veggies to the plate with the chicken.
5- In the same skillet, add the broth, cream, diced tomatoes, uncooked pasta, and salt. Stir to combine and bring to a boil, then cover, reduce heat to medium-low, and cook for 15 minutes until pasta is tender and liquid is mostly absorbed. 
6-Add the chicken and veggies back into the skillet and stir to combine until heated through, about 2 minutes. 

Thursday, July 16, 2015

Crockpot Honey Sriracha Chicken


I love the crockpot for convenience but don't love what it does to chicken. Well, correction, I like bone-in chicken in the crockpot, but I feel like it kills breasts. Since I'm home on maternity leave/summer break I decided to try making it but keeping it to the lower end of the time range. That definitely helped. This chicken was tasty. It was flavorful and spicy, and the sauce that was drizzled over it sealed the deal. The sauce was creamy and cool which was a nice contrast to the heat of the chicken. I loved it over the simple rice... such an easy but tasty dinner!

Source: Slightly adapted from Crockpot Gourmet

Ingredients:
1 to 1½ pounds boneless skinless chicken breasts
¼ cup Sriracha sauce
¼ cup honey
1 tablespoon soy sauce

For the drizzle:
¼ cup mayo
¼ cup greek yogurt
¼ cup sweet chili sauce
2 tablespoons honey

Fresh chopped cilantro (optional)

Instructions
1- Cut chicken into large bite sized chunks.
2- Place in the crockpot. In a bowl mix together Sriracha, ¼ cup honey, and soy sauce.
3- Pour over chicken, cover and cook on high for 2-4 hours or low for 5-7 until chicken is cooked through.
4- Whisk together drizzle ingredients.
5- Serve chicken with rice or noodles as desired with a generous drizzle of the sauce. Top with cilantro, if desired.

Thursday, July 2, 2015

Baked Foil Wrapped Chicken Cheesesteaks


We recently got back from a beach vacation and since our return I've been dreaming of chicken cheesesteaks. When we were at the beach there was a little luncheonette connected to our hotel so John would pick us up sandwiches daily while Landon napped and I think I ate a cheesesteak... daily. What can I see.. a pregnant woman knows what they want. I decided I wanted to make my own when we got home so I threw it together, wrapped it in foil, and baked it. I've learned that I really like baking my sandwiches once they are done if they are meant to be served hot and melty with cheese because it helps melt the cheese, toast the bread, etc. John and I both loved these! A real "must make" again.

Source: Stephanie Cooks Original

Ingredients:
1 tsp olive oil
1 bell pepper, sliced thin (I used half a red and half a green)
4 thin chicken breasts
Garlic powder and pepper
Lawry's  seasoning salt
2 sub rolls
6 slices white american cheese
Tin foil

Directions:
1- Heat oven to 400. Heat a non-stick pan with the oil. Add the bell peppers and allow to heat.
2- Meanwhile, slice the chicken into thin pieces. Add the garlic powder, black pepper, and Lawry's seasoning salt. Coat the chicken well, stirring to evenly coat.
3- Turn up the heat in the pan. Add the chicken. Allow to slightly brown, then stir.
4- Cook until chicken is cooked through. Remove the skillet from the heat and set aside.
5- Slice your sub rolls. Place two slices on the bottom of each sub. Top evenly with the chicken and pepper mixture.  Take the two remaining cheese slices, breaking each in half, and lightly top the chicken mixture with cheese. Cover with the top sub roll.
6- Place each sub in the middle of a square of foil. Fold tightly. Bake 10 minutes, until the cheese is melty and the roll is warm. Serve hot.

Monday, June 29, 2015

Italian Herb Chicken


Every so often I make something that evolves as I am midway through the cooking process. For example, with this meal, I planned to just have an easy meal of baked chicken with seasonings, but then I wanted cheese...and a crunch to the top... and before you know it, I'm in the kitchen adding on as the meal cooks. Inspiration strikes when it strikes... what can I say?

This meal came out absolutely delicious. It was easy to make but so flavorful. I wouldn't suggest doing this with very thin chicken, I think you need chicken that's at least 1/4" thick so it doesn't dry out. John and I both loved this... in fact, I think I'll be making it again this week!

Source: Stephanie Cooks Original

Ingredients:
2 chicken breasts (at least 1/4" thick- not super thin breasts)
2 tbsp lemon juice
1 tbsp olive oil
1 clove garlic, minced
1/2 tsp Italian seasoning
2/3 cup shredded mozzarella cheese
1/3 cup panko
1 tbsp butter
1/4 tsp garlic powder
1/4 tsp dried parsley

Directions:
1- Combine the chicken, lemon juice, oil, minced garlic, and Italian seasonings in a zipper bag. Shake well. Allow to marinade for at least 1 hour.
2- Preheat the oven to 375.
3- Pour the chicken and marinade into an oven safe dish. Bake for 20 minutes (or until chicken is about halfway cooked, depending on the thickness of your breasts).
4- Remove from the oven. Top with the cheese (1/3 cup per breast) and place back in the oven.
5- In a small bowl combine the panko, butter, garlic powder, and parsley. Use your fingers to mush the butter into the panko, making a thick crumb.
6- Remove the chicken again and top with the panko mix.
7- Bake until chicken is cooked through and the topping is golden.

Wednesday, June 24, 2015

Skillet Pesto Chicken Sacchetti


Can I tell you how nice it's been to get back in my kitchen? I've missed eating real food. It's so enjoyable to actually have food with flavor again! Soon enough baby girl will be here and I'll be back on a hiatus, I'm sure, but for now... loving it. With that said, I always rave about the Italian market in my town, but it's just so darn good. I took Landon there this week and figured I'd just buy some stuff that looked good and then go from there with dinners for the week. While there in their fresh pasta section I had to grab a package of the sacchetti. It just looked so darn good. I can't resist a good pasta purse.

This was delicious. Easy to make and full of flavor. Next time I'd add some red pepper flakes to the sauce to give it some heat but as-is it was delicious. A must try. If you can't find sacchetti you can use tortellini.

Source: Stephanie Cooks Original

Ingredients:
2 thin chicken breasts
1/2 cup pesto sauce
1 tsp olive oil
1 tbsp butter
1 clove garlic, minced
1 1/2 cups marinara sauce
2 tbsp pesto
1 package sacchetti (or tortellini)
1/2 cup mozzarella cheese
Parsley

Directions:
1- Dice the chicken into bite sized pieces. Toss with the pesto in a container or zipper bag and allow to marinade for at least an hour (up to overnight).
2- In an oven safe skillet heat the olive oil and butter. Add the garlic and stir until fragrent.
3- Add the chicken (leaving remaining marinade in the container) and cook until lightly browned and cooked through. Remove chicken and set aside.
4- Add the marinara and pesto to the skillet. Stir well and allow to heat together for 20 minutes.
5- Meanwhile, cook the pasta.
6- Strain the pasta and add to the skillet along with the chicken. Top with mozzarella.
7- Place under the broiler of the oven until cheese melts. Top with parsley. Serve hot.

Tuesday, June 16, 2015

Creamy Cajun Chicken Pasta


So... hi. I disappeared. Again. I'll be honest with you... food blogging has not been my thing this pregnancy. In fact, food hasn't been my thing. I'm not talking food aversions, it's more like... food... disinterest. I don't really have cravings or desires for anything. I just eat because I have to. WHO AM I?! Tomorrow is the last day of school and knowing that I will not be working all day has sparked my interest in the kitchen again. I have some old stuff to share with you, stuff I made a looooong time ago, and I am hoping to get busy in the kitchen in the next few weeks prepping for the impending birth of our daughter.

So this pasta. This isn't my first take on cajun chicken pasta, and it won't be my last. There's so many versions of this meal out there and I personally enjoy trying as many as I can. This one is creamy and delicious. We all enjoyed it (well, all except Landon, since he STILL doesn't eat pasta... weirdo!) and I can't wait to try it again.

Source: So Tasty So Yummy

Ingredients:
1 pound penne pasta
2 tablespoons butter, divided
1 tablespoon olive oil
1 pound boneless skinless chicken breasts, cut into strips
1 shallot, minced
2 garlic cloves, minced
½ cup Parmesan cheese, freshly shredded, plus more for garnish
2 ½ cups heavy cream
1 tablespoon Cajun seasoning, plus more for garnish
2 Roma tomatoes, diced

Directions:
1- Prepare the penne pasta per package directions.
2- In a large pan heat 1 tablespoon butter and 1 tablespoon of olive oil. Once the butter has melted into the oil, add the chicken and shallots; season well with salt & pepper and cook for 5 minutes until chicken is cooked through. Remove the chicken from the pan and cover it on a separate dish to keep it warm.
3- Place your remaining 1 tablespoon of butter and your garlic in the pan you removed the chicken from. Let the garlic sauté for about 1 minute, making sure it doesn't brown and burn. Add your heavy cream and when it comes to a light simmer, add your parmesan cheese and mix well. Season with salt, pepper and Cajun seasoning.
4- Add the drained pasta and toss it into the pan with the sauce. Stir in the chicken and tomatoes. Serve, topped with additional Parmesan.

Monday, March 30, 2015

Grilled Chicken Spiedies Sandwich


Freshman year of college I had a roommate from upstate NY- particularly the Binghamton area. I went home with her a few times over the year and quickly learned about chicken spiedies. If you're not from NY (like me) and have never heard of it, it's awesome. In her town they had it everywhere- on pizza, sandwiches, platters, pre-made at the grocery store, at restaurants, etc. I think I ate it in every form I could find!

Since I live a solid 4ish+ hours from there, going for a ride for some chicken is out of the question. I did some searching and came upon this recipe. It needs 24 hours-4 days to marinade (I did 2 days) so you do have to plan ahead. The end results? Delicious. I made half the recipe but next time I'd make the whole thing and use it all week in various dishes. A true throwback to freshman year!

(True confession: I made this last fall and saved it to share this spring! I didn't want to share it in the winter... and since NJ seems to be going on an endless winter, better now that never!)

Source: Grocery Budget 101

Ingredients:

Chicken spiedies:
2-1/2 pounds chicken, cubed
1 cup olive oil
1/2 cup white vinegar
1 tablespoon lemon juice
1 teaspoon salt
2-1/2 cloves garlic, minced
1 teaspoon dried oregano
1-1/2 teaspoons garlic salt
1 tablespoon and 1-1/2 teaspoons crushed dried mint
1 tablespoon dried basil
1/2 teaspoon fresh-ground black pepper

Directions:
1- In a medium bowl combine the olive oil, vinegar, lemon juice, salt, garlic, garlic salt, oregano, garlic salt, mint, basil, and black pepper, whisking together. Place the chicken in a gallon size zip-seal bag. Pour sauce over top.

2- Seal the container and shake until combined. Refrigerate for at least 24 Full hours- up to 4 days, shaking the container to turn the meat every 8 hours or so.

3- Skewer the meat with the soaked skewers and place on grill to cook, turning every three minutes until cooked through and the internal temperature of the meat reaches 170 degrees F.

4- Place chicken on sandwich rolls. Top with cheese, lettuce, and any desired toppings.

Tuesday, March 24, 2015

Chicken Milanese with a Lemon Butter Sauce


Every now and then I stumble across a recipe that needs to be made immediately. I don't wait a week, a month, and sometimes not even a day. This recipe was an example of one of the times when I saw a recipe and made it within 48 hours. My sister was over for dinner that night and all of us loved it. I was a huge fan of the sauce and was sopping it up with my potatoes and green beans. This dinner was so easy to make but the flavor was perfection!

Source: Slightly adapted from So Tasty, So Yummy

Ingredients:
3 tablespoons cold unsalted butter, cut into tablespoons
1 shallot, minced
½ cup heavy cream
½ cup sherry wine
½ cup chicken broth
2 teaspoons freshly squeezed lemon juice

½ cup seasoned dry bread crumbs
¼ cup panko (Japanese bread crumbs)
2 tablespoons grated parmesan cheese
½ teaspoon dried thyme
1 egg
1 tablespoon water
1 pound chicken breasts
Vegetable oil, for frying

Directions:
1- In a small sauce pan, melt 1 tablespoon of the butter. Add the shallot and cook until softened, about 3 minutes. 
2- Add the cream, wine and broth; bring to a boil. Simmer for 15 minutes, remove from the heat and whisk in the remaining butter, 1 tablespoon at a time. 
3- Stir in the lemon juice; salt and pepper to taste.
4- In a shallow bowl, combine the bread crumbs, panko, Parmesan and thyme. In another shallow bowl, whisk the egg and water. 
5- Dredge each chicken piece in the egg, then bread crumb mixture. Transfer to a parchment lined baking sheet. Heat ¼" oil in a large skillet over medium-high heat. 
6- Fry the chicken breasts cooked through, about 3 minutes a side. Serve topped with the lemon butter sauce.

Monday, February 23, 2015

Chicken Alfredo French Bread Pizzas


Growing up we had two kitchens in my house- one upstairs and one downstairs. From a very early age I took eating very seriously and had certain foods I just did not want to share. When one of those came into the house I would hide it in the downstairs freezer with hopes that nobody would notice. Stouffer's used to make these 4 cheese white french bread pizzas that I LOVED (and religiously hid downstairs). I tried looking for them recently and couldn't find them anywhere. I decided to make my own and, well, like anything, homemade trumps. These pizzas were totally delicious. John and I were huge fans. The creamy sauce went so well with the tomato and basil. The crisp bread was perfect. I love pizza in all forms but french bread will always be tops for me!

Source: Stephanie Cooks Original

Ingredients:
1 loaf of french bread, cut in half lengthwise
Alfredo sauce (homemade or jarred)
1 cooked chicken breast, diced
1 large tomato, chopped
1 cup mozzarella cheese
5 basil leaves, torn or roughly chopped

Directions:
1- Preheat the oven, preferably with a pizza stone, to 425.
2- Cover the bread with a layer of alfredo sauce. Top with diced tomatoes and chicken.
3- Sprinkle mozzarella cheese over top.
4- Bake on the pizza stone until the cheese is melted, about 10-12 minutes.
5- Remove and top with basil. Using a sharp knife cut the pizza into individual servings and serve hot.

Sunday, January 25, 2015

OMG Crockpot Chicken


As I've evolved as a cook I rely less and less on easy ingredients and focus on more real ingredients. With that said... this meal is the LEAST "real" meal I've made in a long time! There's tons of processed ingredients, it's full of sodium, and therefore delicious. This recipe was all the rage in an online community I'm in so I decided to try it. John loved it. I liked it. I felt like it was a little "fake" tasting, a little salty, but overall tasty. I ended up keeping it on warm for a long time so the sauce dried up a bit. Next time I wouldn't let it sit on "keep warm" for quite as long as I did. I saved the leftover chicken to turn into paninis which I think will be very tasty! If you're looking for a super easy crockpot meal, this is for you.

Source: Complete Recipes

Ingredients:

2 lbs boneless skinless Chicken Breasts
1 can cream of chicken soup
1 packet of dry Italian dressing
1 packet of dry ranch dressing
1 8oz pkg of cream cheese

Directions:
1. Throw everything in the crockpot on low and cook 6-8 hours.
2.After about 4 hours of cooking I usually stir everything together- but if you're not home it's no big deal.
3. Just stir about 20 minutes before serving to really mix together the cream cheese and dressing packets.

Monday, January 19, 2015

Crispy Southwestern Chicken in a Salsa Verde Cream Sauce


If you follow me on Facebook you're aware of why I've disappeared for the past two months! If you don't, I'm so excited to announce that I am pregnant with our second child, due in July. I am just about 14 weeks pregnant now and finally feel great again. Not only did I not blog for two months but I didn't eat or cook! We survived on cereal and pasta with butter. I'm so happy to be back in the kitchen!

So many of the meals I'm sharing are pre-pregnancy. I have a huge backlog of recipes to share that got stalled from my inability to look at pictures of food. This meal was a meal that almost didn't happen. I made this when I was about 5 weeks pregnant and I planned to make it with grilled chicken. When I opened the package of chicken, which was still good, it smelt horrible. I decided to toss it and switch directions of the meal. I used my favorite chicken tenders, Coleman's All Natural chicken tender, and proceeded. This was DELICIOUS. Best of all I usually have all these ingredients on hand so it's an easy meal to make. John and I were both huge fans. The sauce makes it look a bit sloppy but the flavor or the sauce pulls the whole meal together!

Source: Stephanie Cooks Original

Ingredients:
8 breaded chicken tenders, homemade or frozen
1 tsp olive oil
1 clove garlic, minced
3/4 cup salsa verde
1/3 cup light cream
Juice of half a lime
1 cup of corn
1/2 cup chopped bell peppers
Rice

Directions:
1- Cook the chicken tenders according to packaging directions.
2- Meanwhile, heat the oil and garlic in a sauce pan. Add the salsa verde and heat for 5 minutes. Stir in the cream and lime juice and heat over a low heat for 10 minutes.
3- In a small skillet combine the corn and bell peppers and heat over a low heat, stirring regularly, until hot.
4- Dice chicken. On a plate place rice at the bottom. Top with chicken, veggie mix, and sauce (to taste).

Monday, November 24, 2014

Creamy Balsamic Chicken


Before I was a mom I had visions that I would be the mom who had a kid that was a great eater. Then I had Landon and the fist year and a half he was a great eater, so I assumed I rocked. I mean, I cook! A lot! All types of stuff! I assumed it was a given. I was even smug about it. "Oh...your kid eats XYZ?! No...not mine... He LOVES healthy foods..." (of course this occurred in my head... but it did occur).

Then Landon turned 18 months. Then two. Then 2.5. Now he's turning 3 this week. It seems like every six months the list of foods he likes gets smaller. By 3.5 I am sure he will live on air and crackers alone.

Anyway, why am I telling you this? Get to the point, right? So this chicken. Look, Landon LOVES chicken and will usually used to eat it any way I present it. Then I made this. I made a point to make sure it wasn't gloppy, mostly unsauced, but no. He told me it was gross, looked messy, and was "too yucky to even taste." ::sigh::

But let me tell you, my kid has no taste. This was so delicious that John and I swept the carefully cut pieces off of Landon's plate and back onto ours. It was too good to go to waste. The sauce had a nice balance of creamy and tart. The chicken was so tender... just an all around winner!

Source: Adapted from Lauren's Latest

Ingredients:
1 pound chicken tenders
Lawry's Seasoning Salt
Cracked black pepper
1 tbsp butter
1/2 15 oz jar light alfredo sauce (or more if you like it saucy)
1-2 tbsp balsamic vinegar (depending on how tart you want it)

Directions:
1- Season chicken with Lawry's and pepper. Set aside.
2- Add butter to a skillet over medium/high heat and melt. Add the chicken and allow to brown on one side, then flip. Once brown on both sides, remove.
3- Add the sauce and vinegar. Allow to heat together for 5 minutes, scraping up the brown bits from the pan.
4- Add the chicken back to the pan. Top with dried parsley for color (if desired). Once hot, serve over pasta.

Sunday, November 16, 2014

Ranch Chicken Enchiladas


It wasn't too long ago when I had realized I had never had a "real enchilada"- meaning one from a Mexican restaurant. Sure, I've been making them at home for a few years, but I had never gotten them out. We went out a couple weeks ago and I ordered enchiladas and I can honestly say... I prefer my own. There. I said it. I just love the fun varieties and versions that you can make at home! There are many foods that I find are just as good if not better out, but not enchiladas.

This version in particular was deliciously easy. Mix some of this with some of that and TA-DA... you have a delicious and easy meal. I can't wait to have these again.

Source: Heavily adapted from The Recipe Critic

Yields 6 enchiladas

Ingredients:
Tortillas (I like the half corn/half flour ones)
2 cups cooked, diced, chicken (rotisserie works great)
3/4 cup salsa
1/2 cup ranch salad dressing
1 1/2 cups cheddar cheese
Green onions

Directions:
1- Preheat the oven to 350.
2- In a bowl mix the salsa and ranch. Spread a little bit onto the bottom of a baking dish.
3- Take a tortilla. Spoon about 1 heaping tbsp of the sauce mixture onto the tortilla and spread. Top with chicken and cheese. Roll up and place seam down in the baking dish.
4- Repeat until all enchiladas are full.
5- Pour remaining sauce over top and top with additional shredded cheese.
6- Bake, covered, for 20 minutes. Uncover and bake an additional 5-10 minutes, until all cheese is melted and edges golden.
7- Top with green onions and lightly drizzle with additional ranch dressing.

Wednesday, November 5, 2014

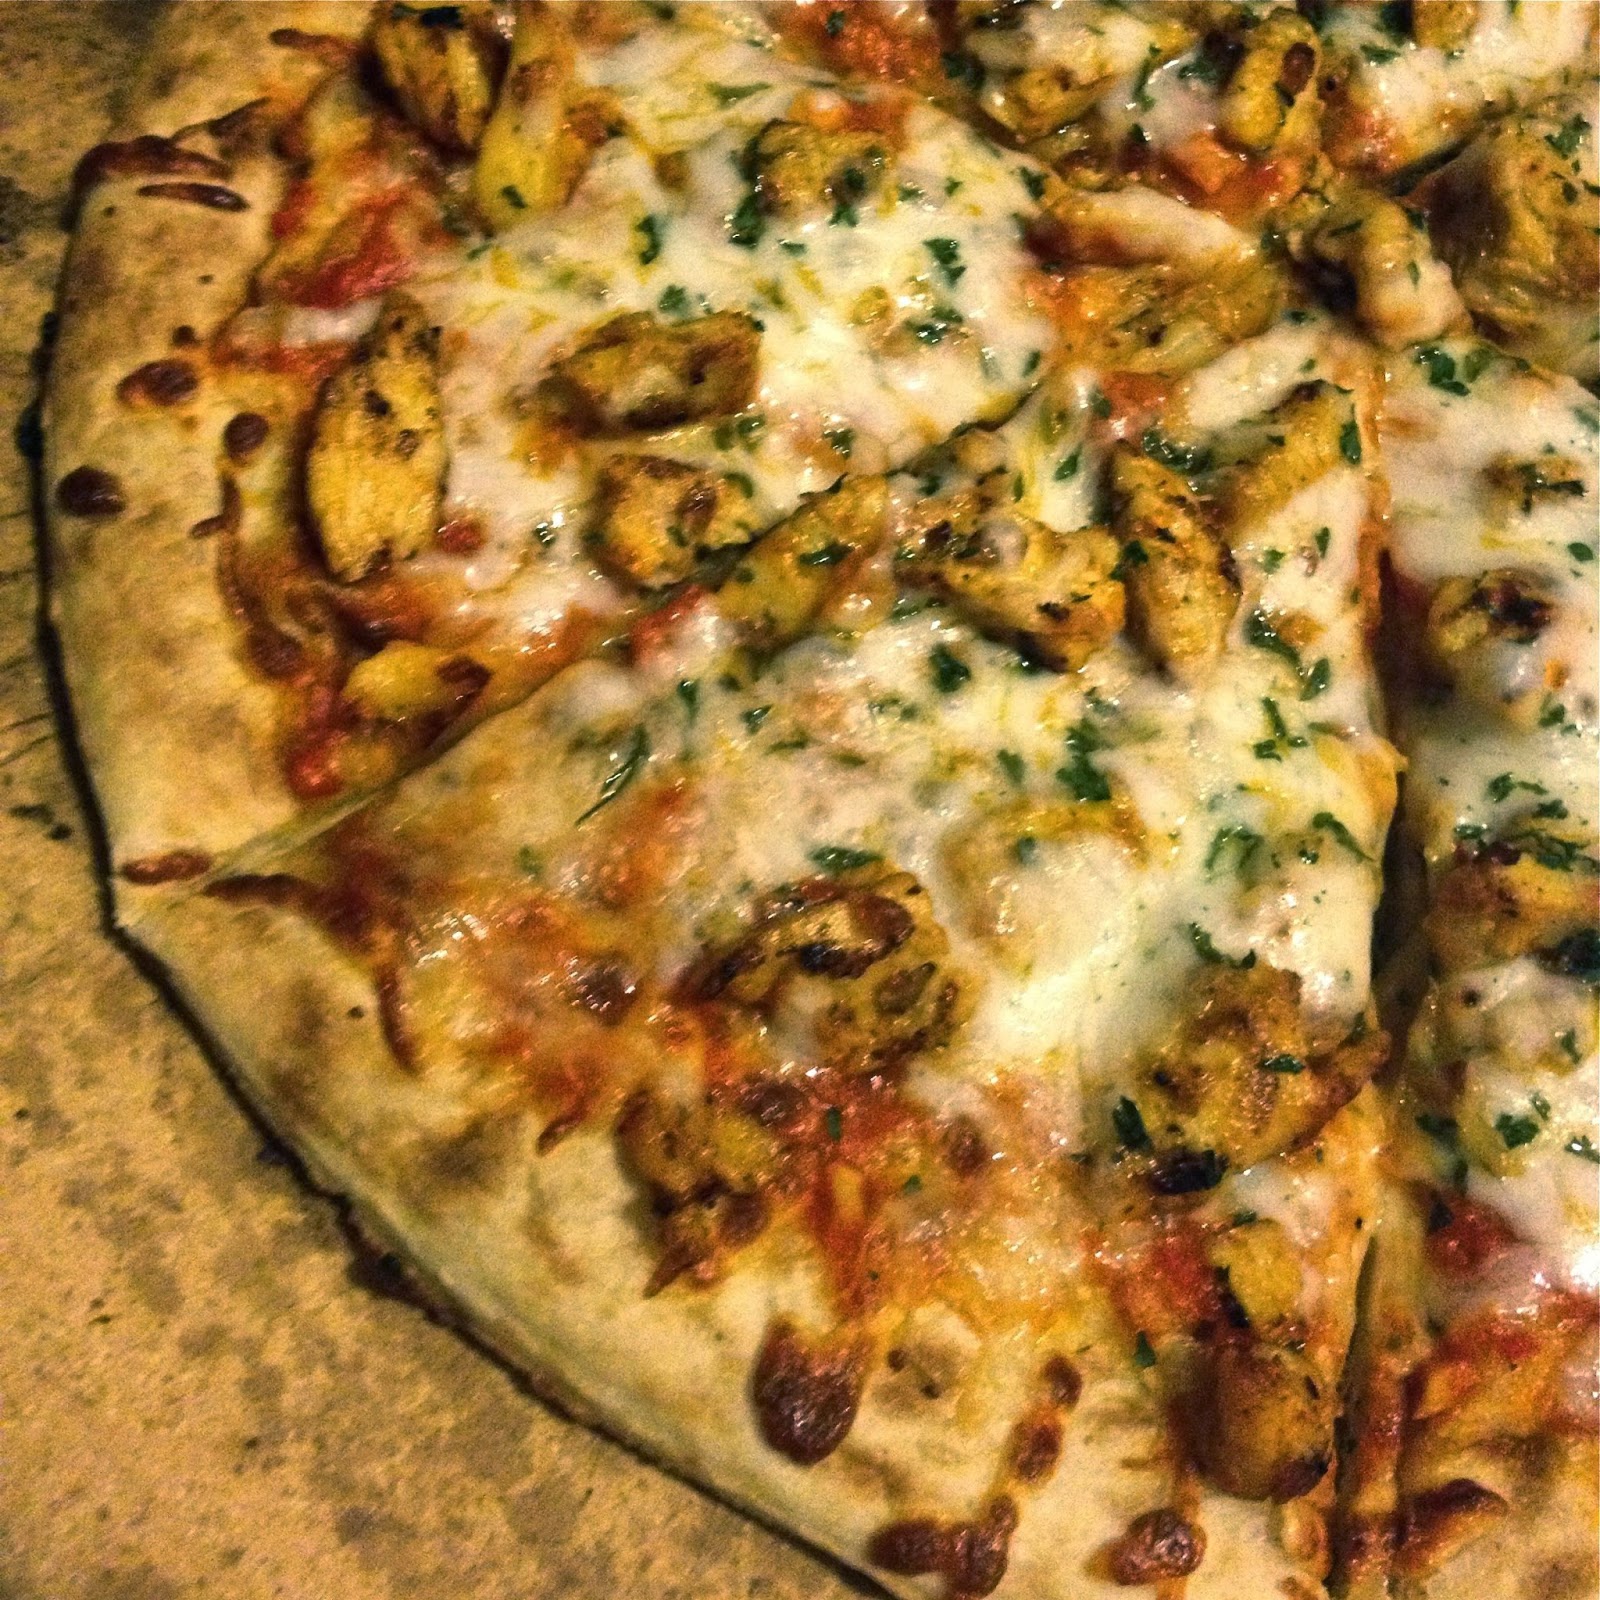
Grilled Chicken and Vodka Pizza


Everyone has a go-to meal for when they need to make something fast but don't have time or energy to devote to a really fancy meal. For me that easy meal is pizza. All three people in the Stephanie Cook's household love homemade pizza so that makes it an even easier choice. I know it's almost taboo to admit this in food blogging world but I LOVE Boboli's thin crust pizza crust. When I cook it on my pizza stone at 450 (or even 500) it gets so crisp and light. I still love me some homemade dough, but when I'm in a pinch a thin crust Boboli is my go-to meal.

I recently spent a LOT on a jar of vodka sauce (well, I thought it was a lot... $8 for a jar of sauce is steep but I was dying to try it) and I didn't want to see any go to waste. After making pasta with vodka sauce one night I found myself with 1/2 a jar left. I decided to use it on pizza and it was delicious! John kept raving about it and even Landon was enjoying it. I still have quite a bit left so I think I'll be making this again this week!

Source: Stephanie Cooks Original

Ingredients:
1 pizza crust
1 tsp olive oil
1 grilled chicken breast, sliced thin
1/2-3/4 cup vodka sauce
3/4 cup mozzarella cheese
1 tsp dried parsley

Directions:
1- Preheat the oven with a pizza stone in it to 450.
2- Heat the oil on high in a nonstick skillet. Add the chicken and 2 tbsps vodka sauce. Allow it to brown around the chicken, stirring often.
3- Pour remaining sauce over the crust and spread evenly.
4- Top with grilled chicken.
5- Top with marinara sauce and parsley.
6- Bake 10-12 minutes, until golden.

Wednesday, October 29, 2014

Balsamic Chicken and Pasta


If you've been reading my blog for any period of time you know there's two things you can always count on me for: pasta recipes and chicken recipes. Chicken AND pasta in one recipe is another pretty likely candidate. I know what works for me and I stick to it, ok?

This dinner was one of those "I have some of this...and a bit of that... and a little bit of this..." type meals. I start off with a general idea (balsamic chicken) and go from there. We really enjoyed this. The balsamic flavor was subtle so if you like a stronger balsamic kick to your meals I'd up it, but only add an extra tablespoon and taste it, then more and taste it, etc. You can always add more but you can't take away some and too much balsamic can be a very strong taste to mask!

Source: Stephanie Cooks Original

Ingredients:
1/2 pound chicken breast, cut into 1" pieces
Garlic salt and pepper
1 tbsp olive oil
3 cloves garlic, minced
1 cup chicken broth
2 tbsp balsamic vinegar
3/4 cup heavy cream
1 diced tomato
1 tbsp dried parsley
1/2 pound penne pasta

Directions:
1- Season chicken with garlic salt and pepper, until well seasoned on all sides.
2- Heat oil in a large non-stick skillet. Add the garlic and stir for about 1 minute.
3- Add the chicken to the pan and allow to brown on one side. Flip, allowing to brown on the other side. Cook 2-3 minutes.
4- Remove the chicken from the pan and cover.
5- Add the broth and cook over high heat for about 4 minutes, scraping up the bottom of the pan.
6- Add the balsamic vinegar and cream. Stir well. Add the tomato and parsley. Turn the heat down low and cook for about 10 minutes, stirring frequently.
7- Meanwhile, cook the pasta according to package directions.
8- Add the chicken back into the sauce and allow to heat through.
9- Add the hot pasta to the skillet, stirring until well coated. Serve hot. Sprinkle with parmesan cheese and fresh basil if desired.

Sunday, October 5, 2014

Crockpot Apricot and Onion Chicken


It's finally starting to cool off and you know what that means- more cozy meals! I love fall and winter food... it's so comforting and (typically) easy to make. This crockpot meal is a perfect example. I threw a few things in the crockpot, went about my day, and in the end had a meal that everyone enjoyed. Best of all Landon was a huge fan. I love any meal that gets Landon to eat something out of his typical rotation!

Source: Adapted from The Frugal Gals

Ingredients:
1 pound chicken breasts
1 packet Lipton's Onion Soup Mix
1/2 cup Asian Sesame salad dressing (many brands have a version)
1/2 cup apricot jelly
Sesame seeds

Directions:
1- Combine all of the ingredients, except the sesame seeds, in the crockpot. Stir well.
2- Cook on low 6 hours.
3- Sprinkle with sesame seeds and serve.

Sunday, August 31, 2014

Grilled Asian Glazed Chicken


(I'm choosing to ignore the fact that this is my first post in almost two months! This has been my longest break from the blog... ever. I have also been barely cooking. Yikes! All I can say is that I am so happy to have my mojo back, as is my family!)


Interesting fact: Landon loooooves Asian food. Loves. Any Asian flavor is sure to be a hit with him. Italian food? Nah. Not interested. Asian? He's obsessed. This works well for me since I, too, enjoy Asian flavors. I had planned to make bang bang chicken skewers  for dinner one night but at the last minute changed my mind since those don't work for Landon and his food allergies. I'm so glad I did because this was a meal we all enjoyed! Landon ate a whole piece of chicken and finished the leftovers over the next day or so. With a kid who survives on air and yogurt smoothies it's always a joy to find a meal he will eat!

Source: Stephanie Cooks Original

Ingredients:
3/4 pound chicken breasts

Marinade:
2 tbsp sweet Thai chili sauce
2 tsp teriyaki sauce
2 tsp honey

Glaze:
2 tbsp sweet Thai chili sauce
2 tsp teriyaki sauce
1 tbsp honey
Sesame seeds

Directions:
1- Combine the chicken with the ingredients in the marinade. Allow to sit for at least 3 hours, up to 24.
2- When ready, grill until chicken is cooked through (time varies based on thickness of chicken).
3- Combine glaze ingredients (except for sesame seeds) in a bowl. Once chicken is removed from the grill immediately brush glaze over the top. Top with sesame seeds. Serve hot.